
Best Glues for Model Airplanes CA Epoxy Wood Glue and More
Pick the wrong glue for a model airplane and the airplane will tell on you. Maybe not on the bench. Maybe not during the taxi test. It’ll wait until the first hard landing, then a wing skin pops loose like it was held on with polite encouragement.
The good news is that model airplane glue choices aren’t mysterious. Each adhesive has a personality. CA is the caffeinated friend who gets things done right now. Epoxy is the dependable one who brings clamps and a timer. Wood glue is neat, sandable, and quietly brilliant. Traditional cement is picky but perfect on certain plastics. Polyurethane foams like a science fair volcano and sometimes saves the day.
The trick is knowing where each one shines, where it fails, and where it should be banned from the bench before it starts making bad decisions.

Match the glue to the job, not the other way around
A model airplane isn’t one material. It’s usually a sandwich of balsa, plywood, foam, fiberglass, plastic, covering film, hardwood blocks, carbon bits, and the occasional “I’ll just fix that later” mistake.
That’s why no single glue wins everything.
Here’s the fast version:
Adhesive | Best at | Watch out for |
Cyanoacrylate, or CA | Fast balsa joints, field repairs, wicking into tight seams | Brittle joints, poor gap filling with thin CA, foam damage with unsafe formulas |
Epoxy | High-stress joints, firewalls, landing gear blocks, fiberglass work | Weight, mess, long cure, poor sanding compared with wood |
Wood glue | Balsa and plywood construction, laminating, sheet joining | Needs tight-fitting joints, needs clamping, not ideal on oily or nonporous surfaces |
Traditional cement | Styrene and some plastic kit parts | Not for balsa structure, foam, or most film-covered surfaces |
Polyurethane glue | Foam-safe bonding, mixed materials, gap filling with clamp pressure | Expands as it cures, messy, rubbery sanding, needs moisture |
A good building rule is simple: use the least dramatic glue that does the job well. If a neat wood glue joint will work, don’t automatically reach for epoxy. If a tiny CA tack will hold a rib in place, don’t turn the wing into a resin sculpture.
Cyanoacrylate glue is the fast builder’s best friend
Cyanoacrylate, usually called CA, is the instant glue that changed balsa building forever. It cures when it contacts small amounts of moisture on the surfaces being joined. That’s why it grabs wood quickly, why it can glue your fingers together with Olympic-level enthusiasm, and why old bottles get cranky over time.
CA comes in common thicknesses:
Thin CA
Water-like, wicks into tight joints.
Medium CA
Slower, slightly gap filling, good for general assembly.
Thick CA or gel CA
Best when parts don’t fit perfectly, but it takes longer and can be heavier.
There are also foam-safe CA formulas. Regular CA can attack some foams, especially expanded polystyrene, so don’t guess. Test on scrap first unless the label clearly says foam-safe.
Where CA shines
CA is terrific for general construction in balsa airplanes. If ribs, formers, stringers, and sheeting parts fit well, CA makes quick work of them.
It’s especially useful for:
Tacking balsa parts before a slower glue cures
Wicking into laser-cut balsa joints
Repairing cracked ribs or split sheeting
Hardening small holes for screws
Sealing and toughening balsa edges
Field repairs where “fly again in 10 minutes” is the plan
Thin CA is magic on tight joints. Hold the parts in position, touch the bottle tip to the seam, and capillary action pulls the glue in. It feels like cheating, but legal cheating, like using a fresh hobby blade.
Medium CA works better for joints with a tiny bit of unevenness. It gives you a few extra seconds to position parts before it grabs.
For edge-joining sheets, CA can work if the edges are very clean and you’re joining small panels. Tape the sheets together on one side, open the joint like a hinge, apply a tiny amount of thin or medium CA, then close and press flat on wax paper. The joint sands well enough if you don’t flood it.
Where CA is a bad idea
CA’s biggest weakness is brittleness. It’s strong in many model-airplane situations, but it doesn’t love peel loads, vibration, repeated flexing, or oily surfaces.
Avoid CA for:
Large laminating fuselage doublers
Foam wing skins unless using foam-safe CA and the design allows it
High-load firewall joints
Landing gear mounts
Large gaps where you’re hoping glue will replace craftsmanship
Thin CA also soaks deeply into balsa. That can be good when you want hardening. It can be bad when you’re trying to sand a smooth surface. A CA-soaked patch sands slower than the surrounding balsa, so you can accidentally create low spots around it. The glue line stays hard while the wood disappears. Very rude behavior.
CA accelerator, also called kicker, speeds cure dramatically. Use it lightly. Too much kicker can make CA cure brittle and crusty, and it can leave residue that affects covering or finishing. If your airplane smells like a chemical banana got into a fight with a marker pen, you probably used too much.
Practical CA notes
Clamping
Usually not much is needed. Hold parts firmly until the glue grabs. For larger seams, pins, magnets, or masking tape can keep parts aligned.
Soaking
Thin CA wicks aggressively into end grain and cracks. Great for strengthening. Bad if you need a clean sanding surface.
Sanding
CA sands harder than balsa and can gum paper if applied heavily. Use it sparingly where the surface must be perfect.
Curing
Thin CA cures in seconds on close-fitting joints. Thick CA takes longer, and deep blobs may cure slowly in the middle.

Epoxy is for strength, gaps, and high-stress trouble spots
Epoxy is a two-part adhesive made of resin and hardener. Mix them together and a chemical reaction cures the glue. Unlike CA or water-based wood glue, epoxy doesn’t need air exposure to dry. It cures through the mix itself, which makes it great for enclosed joints and thick bonds.
Common hobby epoxies are sold by working time, often in quick, medium, and slow versions. The exact numbers vary by brand, but the pattern is reliable: fast epoxy gives less working time and often a more brittle bond, while slower epoxy usually cures stronger and gives you time to align parts.
Where epoxy shines
Use epoxy when the joint carries real loads, handles vibration, or joins materials that wood glue can’t handle well.
Epoxy is a smart choice for:
Firewalls and engine mounts
Electric motor boxes
Landing gear blocks
Wing joiners and dihedral braces
Fiberglass cloth and reinforcement patches
Bonding plywood to hardwood
Installing control horn blocks
Joining carbon fiber or fiberglass parts to wood, after scuffing
For laminating fuselage doublers, epoxy can work very well, especially when the doubler is plywood and the area handles landing loads, wing saddle stress, or motor vibration. Spread a thin, even film, clamp or weight the parts flat, and wipe squeeze-out before it cures.
Do not turn the lamination into a peanut butter sandwich. More epoxy doesn’t mean more strength. It usually means more weight, more sanding, and more regret.
Epoxy is also useful where the joint has small gaps. It doesn’t shrink much as it cures, and it bridges irregularities better than most wood glues. A little milled fiber, microballoons, or fine sawdust can thicken epoxy for fillets, but keep structural needs in mind. Lightweight fillers improve shaping, not always strength.
Where epoxy is a bad idea
Epoxy is strong, but it’s not always the best glue for balsa construction.
Avoid epoxy for:
Most light balsa rib and former assembly
Large foam wing skins if weight matters
Long sheet joints that need easy sanding
Places where excess glue will be hard to remove
Hinges unless the hinge type specifically calls for it
Epoxy adds weight fast. A few “just to be safe” epoxy joints can turn a lively airplane into a flying damp towel. It also sands much harder than balsa. If a glue bead cures proud on a sheeted surface, sanding it flush can dish out the wood around it.
For foam, epoxy is usually chemically safe, but it can be heavy and stiff. On large wing skins, that stiffness can create stress points. If the wing needs a flexible, broad-area bond, epoxy may not be the best fit unless the design calls for it.
Practical epoxy notes
Clamping
Use enough pressure to close the joint, not enough to squeeze every bit of glue out. For doublers, use flat boards, wax paper, and many clamps or weights.
Surface prep
Scuff shiny plywood, fiberglass, carbon, or plastic with sandpaper. Clean dust and oil before gluing.
Mixing
Mix thoroughly. Scrape the cup sides and the stir stick. Badly mixed epoxy can stay rubbery forever, like a gummy bear with engineering responsibilities.
Sanding
Once cured, epoxy sands hard. Shape squeeze-out while it’s in the rubbery “green” stage if you can.
Curing
Cooler shops slow epoxy. Warm temperatures speed it up. Give structural joints full cure time before stressing them.
Wood glue is the quiet hero of balsa and plywood
Wood glue doesn’t get the flashy reputation CA gets, but it’s one of the best adhesives for model airplane building. For balsa and plywood, aliphatic resin glue, often called yellow carpenter’s glue, is a bench staple. White PVA glue also works, though it usually sands a little softer and cures more slowly.
Wood glues bond by soaking slightly into porous surfaces and drying as water leaves the joint. That means they need good wood-to-wood contact. They’re not gap-filling champions.
Where wood glue shines
Wood glue is excellent when you want a strong, light, sandable joint and you can clamp or pin the parts while it dries.
Use it for:
Laminating fuselage doublers
Edge-joining sheets
Balsa and plywood fuselage sides
Built-up tail surfaces
Spar webs
Sheeting where you can pin or clamp
General wood-to-wood construction when time allows
For laminating fuselage doublers, wood glue can be the best choice when both surfaces are wood and the design doesn’t need fuel-proof epoxy. Spread a very thin, even coat with a scrap of balsa, an old card, or a small brush. Cover the outside with wax paper and clamp between flat boards.
The big win is sanding. Yellow wood glue sands much closer to balsa than CA or epoxy. It also gives you time to align long parts before the glue grabs. That matters with doublers, because a crooked doubler is the kind of mistake that stares at you for the rest of the build.
For edge-joining sheets, wood glue is hard to beat. Sand the sheet edges straight, tape the pieces together on the outside face, fold open, apply a thin bead, close flat, wipe excess, and weight the panel on wax paper. Once cured, the joint sands beautifully.
Where wood glue is a bad idea
Wood glue doesn’t like nonporous surfaces. It also doesn’t love oily woods or plastic parts. It can bond foam in some cases, but the water needs somewhere to go. Between two non-breathing surfaces, drying can take a long time.
Avoid wood glue for:
Metal, fiberglass, and carbon parts
Plastic cowls or canopies
Foam skins over sealed foam where drying is trapped
Thick glue blobs in gaps
Fast field repairs
Fuel-soaked glow models unless protected by finish or fuel proofer
Wood glue also shrinks as it dries. That’s usually fine in tight joints, but it’s poor gap filler. If you can see daylight through the joint, don’t ask wood glue to perform miracles. It has boundaries.
Practical wood glue notes
Clamping
Wood glue needs clamping pressure. Pins, weights, masking tape, magnets, rubber bands, and flat cauls all count. The goal is firm contact.
Soaking
It soaks into balsa less aggressively than thin CA, but end grain can still drink it. Pre-fitting parts helps prevent starved joints.
Sanding
Aliphatic resin glue sands very well once dry. Wipe squeeze-out before it hardens to avoid shiny glue streaks under covering.
Curing
Handling strength may come fairly soon, but full drying takes longer, especially in cool or humid shops. Don’t rush large laminations.

Traditional cements still matter for plastic parts
Traditional model cement is often associated with plastic scale kits. It’s not just “slow glue.” Many plastic cements work by softening or chemically welding compatible plastics, especially polystyrene. The parts fuse as the solvent evaporates.
That makes cement wonderful for the right plastic and nearly useless for the wrong material.
Where traditional cement shines
Use traditional cement for:
Plastic scale details
Styrene cockpit parts
Plastic pilot figures
Static display parts
Some cowling details, if the plastic is compatible
Non-structural plastic assemblies
Thin liquid cement can run into tight plastic seams by capillary action, much like thin CA does in wood. Tube cement is thicker and slower, useful for some larger plastic parts but easy to overuse.
For plastic scale parts, cement often gives a cleaner joint than CA because it melts the mating surfaces instead of creating a brittle glue layer. Once cured, a welded joint can sand and fill nicely as part of the plastic surface.
Where traditional cement is a bad idea
Traditional plastic cement is not a structural airplane glue. It is also not foam-friendly unless specifically labeled for that use.
Avoid traditional cement for:
Balsa and plywood structure
Foam wing cores
Foam wing skins
Firewalls, landing gear mounts, or motor mounts
Film-covered surfaces
Unknown plastics without testing
Solvent cements can melt foam quickly. That includes many common foams used in wings and ready-to-fly models. If you’ve ever watched foam shrivel under the wrong solvent, you know it has the emotional tone of a tiny disaster movie.
It also won’t reliably bond many modern plastics, such as polyethylene or polypropylene. Those plastics are famously glue-resistant. If a part feels waxy or flexible, test first and consider mechanical fastening.
Practical cement notes
Clamping
Plastic cement needs close contact. Tape, small clamps, or rubber bands work well. Avoid crushing softened plastic.
Soaking
Cement doesn’t “soak” into wood like CA. It softens compatible plastic surfaces. Too much can distort detail.
Sanding
Let cement fully dry before sanding. Soft plastic clogs paper and smears.
Curing
Surface grab can happen quickly, but trapped solvent may take much longer to leave. Thick applications stay soft.
Polyurethane glue is useful, messy, and weirdly alive
Polyurethane glue cures by reacting with moisture. As it cures, it expands and foams. That foaming action helps fill irregular spaces, but don’t confuse foam with strength. The dense glue line does the holding. The airy bubbles mostly add volume and cleanup chores.
This glue is usually sold as a brownish liquid in hardware stores. It bonds wood, foam, and some other materials. It’s waterproof after cure and can be handy in larger model projects.
Where polyurethane shines
Polyurethane glue is a strong option for:
Foam wing skins
Foam cores with wood sheeting
Wood-to-foam joints
Lightly gapped joints where expansion is controlled
Certain mixed-material bonds
Areas where water resistance matters
For foam wing skins, polyurethane is often a favorite because it can bond wood sheeting to foam without attacking the foam. Mist one surface lightly with water, spread the glue extremely thin, then clamp the entire skin evenly. Vacuum bagging is ideal if you have the setup. If not, use beds, weights, flat boards, and plenty of patience.
The key phrase is extremely thin. Polyurethane glue expands. If you apply it like frosting, it’ll foam into lumps, hold the skin away from the core, and create a wing surface that looks like it’s hiding walnuts.
It’s also handy for bonding balsa or plywood to foam in fuselages, turtle decks, and shaped fairings.
Where polyurethane is a bad idea
Polyurethane is not great for every airplane joint. Its foaming can push parts apart if they aren’t clamped well. It also cures to a tough, slightly rubbery texture that doesn’t sand as nicely as wood glue.
Avoid polyurethane for:
Tiny balsa assemblies
Exposed glue lines that need fine sanding
Delicate parts that can shift while curing
Unclamped laminations
Hinges and control linkages
Any joint where expansion would distort alignment
For laminating fuselage doublers, polyurethane only makes sense if one material needs it, such as foam or a difficult mixed surface. For wood-to-wood doublers, yellow wood glue or epoxy is usually cleaner and more predictable.
For edge-joining sheets, skip it. The foam expansion will make the joint lumpy unless clamped perfectly, and the glue line won’t sand as cleanly as wood glue. There are easier ways to suffer.
Practical polyurethane notes
Clamping
Clamping is not optional. The glue expands and can push parts apart. Use broad, even pressure.
Moisture
A light mist helps cure. Don’t soak the parts. Wet balsa can warp.
Sanding
Cured foam squeeze-out cuts better with a blade before sanding. Sanding alone can tear or smear the glue.
Curing
It cures slower than CA and often needs several hours before handling. Give wing skins plenty of time before removing pressure.

The best glue for common model airplane tasks
Sometimes the easiest way to choose glue is to start with the task. Here’s the bench-friendly version.
Laminating fuselage doublers
For wood-to-wood doublers, yellow wood glue is usually the cleanest choice. It spreads thin, sands well, and gives enough working time to align everything.
Use epoxy when the doubler handles serious loads, especially around the firewall, wing saddle, landing gear area, or fuel-exposed zones. Keep the layer thin and clamp flat.
Avoid thin CA for large doublers. It can grab before the part is aligned, soak unevenly into balsa, and create hard spots. Nothing says “fun evening” like a fuselage side permanently glued with a twist in it.
Polyurethane is usually unnecessary unless foam or mixed materials are involved.
Foam wing skins
Use polyurethane glue when sheeting foam cores with balsa or veneer and you can apply broad, even pressure. It’s foam-safe in typical use and fills tiny surface irregularities.
Epoxy can work, but it adds weight and can create stiff spots. Use it only if the design calls for it or the skin material demands it.
Foam-safe CA can work for small foam repairs or tack points, but regular CA can melt foam. Traditional cement can melt foam too, sometimes with impressive speed and zero apology.
Wood glue may work in some foam-to-wood cases, but drying can be slow if moisture gets trapped. Test before committing to a full wing panel.
Edge-joining sheets
Use aliphatic wood glue. It’s the best mix of working time, strength, cleanup, and sanding behavior.
CA works for small panels or quick jobs, but it creates a harder glue line. Epoxy is overkill and sands poorly. Polyurethane expands too much. Traditional cement doesn’t belong here unless the “sheet” is compatible plastic, which is a different hobby party.
General construction
For balsa and plywood built-up structures, use a mix:
Thin CA for tight rib, former, and stringer joints
Medium CA for quick assembly where you need a few seconds
Wood glue for stronger, cleaner joints where you can pin and wait
Epoxy for high-stress areas
Cement for plastic details
Polyurethane for foam-to-wood and broad foam skin bonds
That’s the real answer. Most good builders don’t have one magic bottle. They have a small glue lineup and use each one where it behaves best.
Testing, clamping, and cleanup save more builds than fancy glue
Glue choice matters, but technique matters just as much. A perfect adhesive applied badly is still a bad joint with better branding.
Before gluing anything important, do a quick test on scrap from the same kit. This is especially true for foam, plastic, carbon parts, and laser-cut wood with charred edges.
Keep joints tight
Most model glues are strongest in thin glue lines. Parts should fit before glue enters the chat.
If there’s a gap:
Fix the fit if possible
Use epoxy with filler for structural gaps
Use polyurethane only when expansion won’t distort the part
Don’t rely on thin CA to fill empty space
Clamp with the right pressure
Clamping doesn’t mean crushing. It means holding parts in contact while the glue cures.
For flat laminations, use wax paper and boards on both sides. For curved parts, use tape, rubber bands, shaped cauls, or a jig. For foam skins, pressure must be even across the whole surface. A few heavy books in the middle won’t press the leading and trailing edges unless the setup spreads the load.
Think about sanding before you glue
That little squeeze-out bead may look harmless now. Later, it becomes a fossil.
If the area must be sanded smooth:
Favor wood glue on wood
Use CA sparingly
Remove epoxy before full cure
Trim polyurethane foam with a blade
Let plastic cement dry fully
Respect cure time
“Dry to touch” is not the same as “ready for flight loads.” CA reaches handling strength fast. Wood glue and epoxy need more time. Polyurethane needs pressure until expansion stops and the bond sets.
If you’re building at night, the heroic move is often to clamp the part and walk away. The airplane will still be there tomorrow. Probably. Unless the cat finds the wing plan.
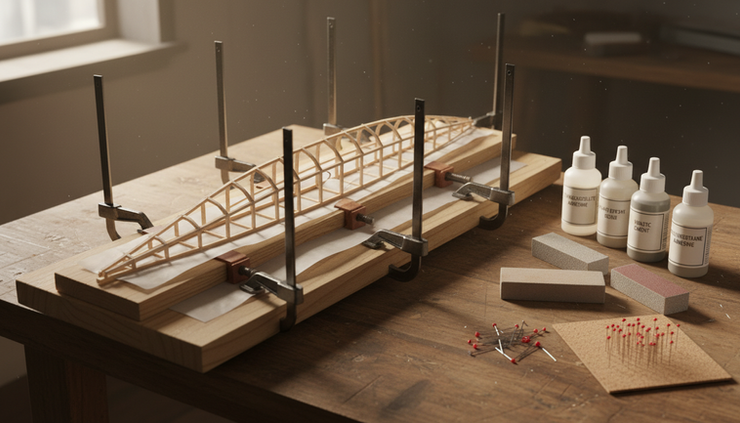
A simple glue kit for the model airplane bench
You don’t need every adhesive sold in the hobby aisle. A practical bench kit can be pretty lean:
Thin CA
Medium CA
Foam-safe CA if you work with foam
Fresh CA tips or micro applicators
Yellow aliphatic wood glue
30-minute or slow epoxy for structural joints
Quick epoxy for noncritical convenience jobs
Plastic cement if you build plastic details
Polyurethane glue if you sheet foam wings
Wax paper, clamps, tape, weights, and mixing sticks
Store CA capped and away from heat. Some builders keep unopened CA cool to extend shelf life, but let it return to room temperature before opening so moisture doesn’t condense inside. Keep epoxy caps clean and don’t swap resin and hardener caps. That little mistake can glue the cap shut better than some modelers glue firewalls.
Wood glue lasts a long time if it doesn’t freeze or dry out. Polyurethane glue reacts with moisture in the air, so it can harden in the bottle after opening. Squeeze out excess air if the bottle allows, cap it tightly, and don’t be shocked if an old bottle turns into an amber brick.
The takeaway is to build with the glue’s personality
The best glue for a model airplane is the one that matches the material, the load, and the amount of time you can hold the parts still.
Use CA for fast, tight-fitting balsa joints and quick repairs. Use epoxy where strength, vibration resistance, and mixed materials matter. Use wood glue for clean balsa and plywood work, especially laminating doublers and edge-joining sheets. Use traditional cement for compatible plastic parts, not aircraft structure. Use polyurethane for foam skins and foam-to-wood jobs where you can clamp evenly and control expansion.
If there’s one bench rule to remember, make it this: glue is not there to fix bad fit. It’s there to lock good fit in place.
Build light, clamp smart, test on scrap, and don’t let thin CA anywhere near your fingertips five minutes before dinner. That sandwich will become a permanent accessory.


Comments